You do not want strangers to copy or edit the content of important documents and reports. If you do not know how to prevent and secure personal data, I will guide you through the steps to set a password for Excel files to prevent viewing, copying and editing. Follow along now!
Nội dung
I. How to set a password for Excel files: avoid editing and copying
1. How to set password, lock
Quick Guide
Open the Excel file that needs a password, select File > Click Save As > Select the Tools button > Select General Options > Select the installation mode (Password to open or Password to modify) and enter the password > Confirm the password you just set > Click Save and you have finished setting the lock for the Excel file.
Detailed instructions
Step 1: First, open the document you want to password protect, click File.
Step 2: Continue, click Save As.
Step 3: The Save As dialog box will appear on the screen, you need to select the location to save the file. Then, click the Tools button as shown.
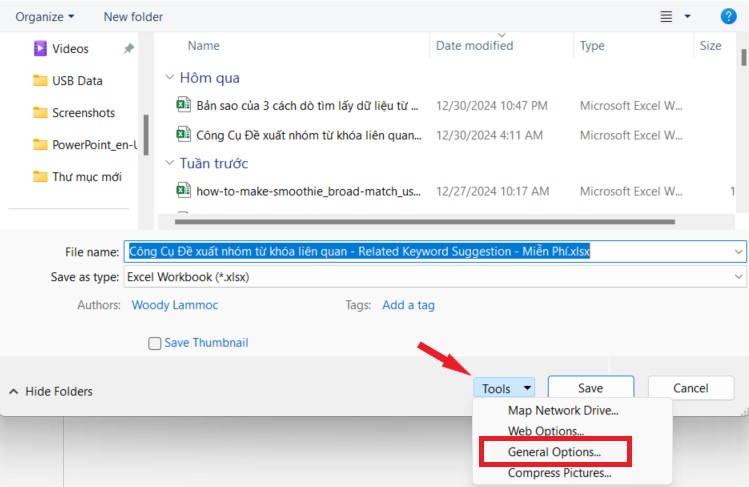
Step 4: Continue, click General Options .
Step 5: At this point, the system will display an interface so you can set a password to open the Excel file.
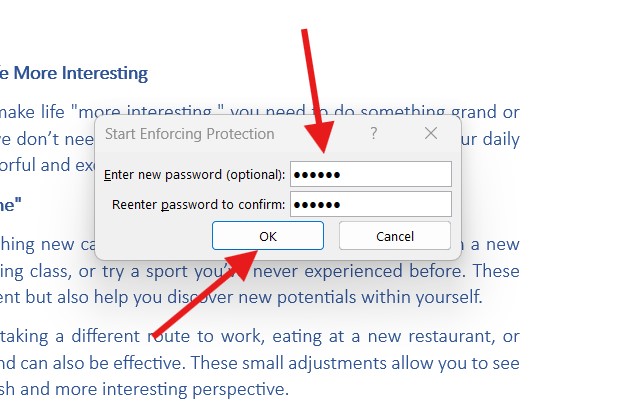
There are 2 password setting modes you can choose from:
- Password to open: requires a password to open the document. If you don’t know the password, you can’t view or edit any content in the file.
- Password to modify: requires a password to edit the document. You can also choose not to enter a password and only read the file content and cannot copy or edit.
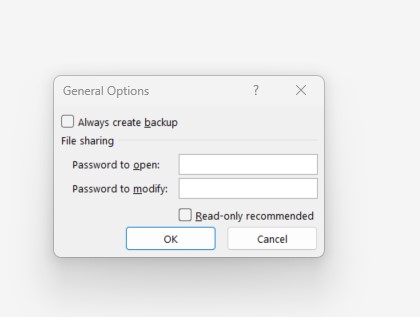
Step 6: Then, you will be asked to confirm the password you just set for the file.
Note: If you set 2 password modes, the system will ask you to confirm 2 passwords in the order Password to open then Password to modify.
Step 7: Finally, click Save to save the settings.
Now when you open that Excel file, a form will appear asking you to enter the password to open the file as shown below.
2. How to remove password, lock
Quick Guide
Open the Excel file and enter the password > Select File > Click Save As > Select the Tools button > Select General Options > Delete the password in the mode you want to cancel > Click OK . So you have just deleted the document security mode.
Detailed instructions
Step 1: Open Excel file and enter password
Step 2: Click File .
Step 3: Continue, click Save As .
Step 4: The Save As dialog box will appear on the screen, click the Tools button as shown.
Step 5: Continue, click General Options .
Step 6: Now, you just need to delete the password in the mode you want to cancel > Click OK . So you have just deleted the document security mode.
II. How to set password and lock using Protect Workbook
1. How to set password, lock
Quick Guide
Open the Excel file that needs a password, select File > Click Protect Workbook > Select Encrypt with Password > Enter the password and confirm the password > Click OK to save the password.
Detailed instructions
Step 1: First, open the document you want to password protect, click File.
Step 2: On the Info tab, click Protect Workbook > Select Encrypt with Password .
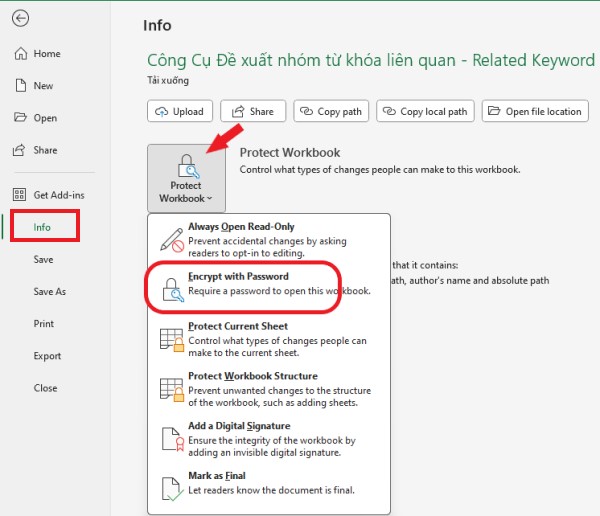
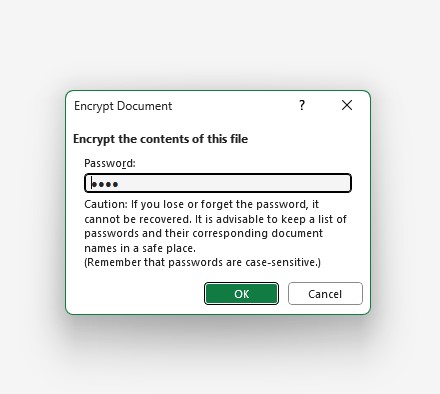
Step 3: The system will display an interface for you to enter the password for the Excel file .
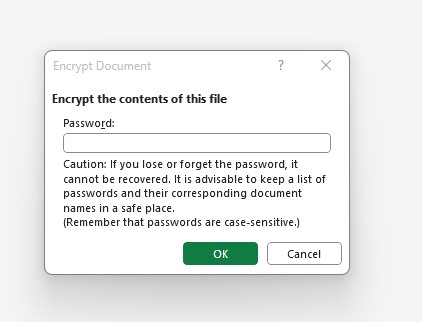
Step 4: Then, you will be asked to confirm the password you just set for the file .
Now when you open that Excel file, a form will appear asking you to enter the password to open the file as shown below.
2. How to remove password, lock
Quick Guide
Open the locked Excel file and enter the password > Select File > Click Protect Workbook > Select Encrypt with Password > Delete the set password > Click OK .
Detailed instructions
Step 1: Open Excel file and enter password
Step 2: Click File .
Step 2: Click Protect Workbook > Select Encrypt with Password.
Step 3: Delete the password you set for the Excel file > Click OK .
III. How to create a password for a sheet on Excel
Note: Normally, this method of creating a lock applies to document files with more than 1 worksheet. Creating a password for a sheet helps you limit the right to edit and change important data.
1. How to set password, lock
Quick Guide
Open the Excel sheet that needs a password, select Review > Click Protect Sheet > Enter the password and click OK > Re-enter the password to confirm and click OK > You have now set the lock for the sheet on Excel.
Detailed instructions
Step 1: First, open the document that needs a password, select the sheet you want to lock editing > Click Review .
Step 2: Click Protect Sheet to lock that sheet.

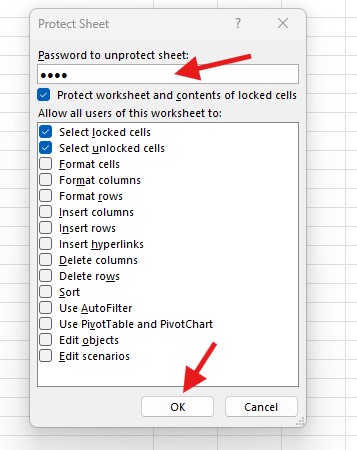
Step 3: Next, enter the password to lock editing > Click OK.
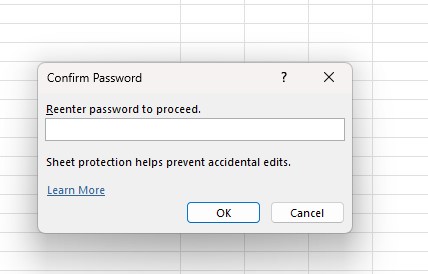
Step 4: The system will ask you to re-enter your password to confirm > Click OK.
Finally, you will see the formatting and editing toolbar of that sheet dimmed as shown. So you have successfully set a password for the sheet!
2. How to remove password, lock
Quick Guide
Open the Excel sheet with a password, select Review > Click Unprotect Sheet > Enter the password set for that sheet > Click OK . So you have just removed the password for the Excel sheet.
Detailed instructions
Step 1: First, open the sheet (spreadsheet) you want to delete the created password > Click Review .
Step 2: Click Unprotect Sheet to remove the lock created for that sheet.

Step 3: Next, enter the set password > Click OK.
Finally, you should see your spreadsheet’s formatting and editing toolbar appear as normal!
IV. How to enable protection for any Excel data area
1. How to set password, lock
Quick Guide
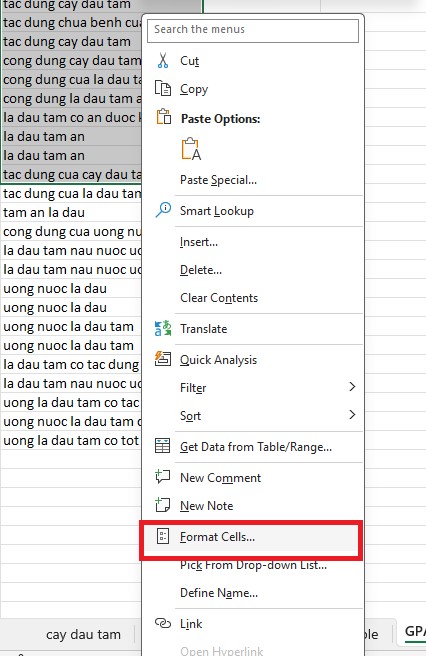
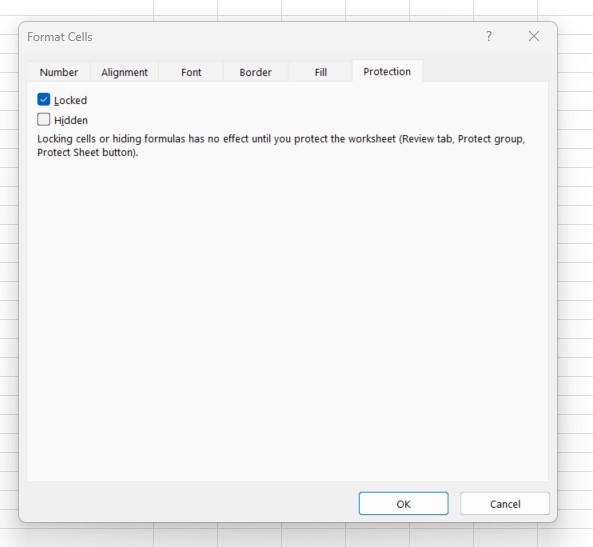
- Highlight the area you want to lock > Right click > Select Format Cells… > Select Locked in the Protection section.
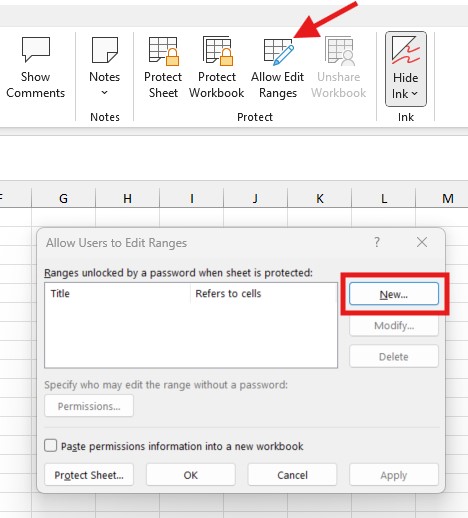
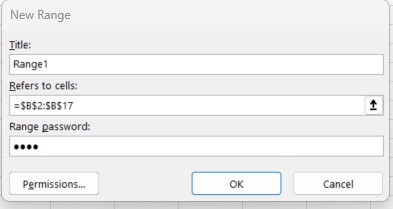
- Click Review > Select Allow Users to Edit Ranges/ Allow Edit Ranges > Click New > Enter password and confirm password > Click OK.
- Select Protect Sheet in the Allow Users to Edit Ranges/ Allow Edit Ranges dialog box > Enter the password and confirm the password > Click OK . You have successfully created a password for the data range!
Detailed instructions
Step 1: Select the Excel data area you need to lock > Right-click > Select Format Cells…
Step 2: In the Protection section, re-check the Locked section > Click OK.
Step 3: Click Review > Select Allow Users to Edit Ranges/ Allow Edit Ranges.
Step 4: In the dialog box that appears, click New .
Step 5: Then, enter the password for the area to be locked as shown below > Click OK.
Step 6: You are asked to re-enter your password to confirm > Click OK.
Step 7: Next, select Protect Sheet in the Allow Users to Edit Ranges dialog box.
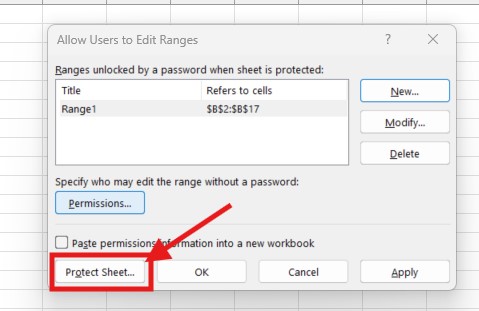
Step 8: Enter the password to lock editing > Click OK.
Step 10: The system will ask you to re-enter your password to confirm > Click OK.
Finally, when you click on the locked area, you will see a similar password request command appear below. So you have successfully created a password for the data area!
2. How to remove password, lock
Quick Guide
Select the locked data area > Select Review > Click Unprotect Sheet > Enter the set password > Click OK.
Detailed instructions
Step 1: Select the password-locked data area > Click Review .
Step 2: Click Unprotect Sheet to delete the created key.
Step 3: Next, enter the password created for that area > Click OK .
Above is a detailed article guiding you on how to set passwords and locks for Excel files. Hopefully it will help you secure your documents, prevent strangers from copying and editing content. Wish you success!
See more: 6 Ways to separate data in Excel simply and quickly
