Are you looking to add fonts to microsoft Word to make your documents more unique? Don’t worry, this article will guide you how to add fonts to Word easily and quickly!
Nội dung
I. Secret to easily add fonts to Word
On the Windows operating system, we have 03 different ways to add fonts to Word quickly and conveniently. Below are details on how to add fonts to Word on the Windows operating system.
1. How to install fonts directly into Word
For those who don’t have much experience with fonts, just adding a few important fonts for immediate use, you can do the following:
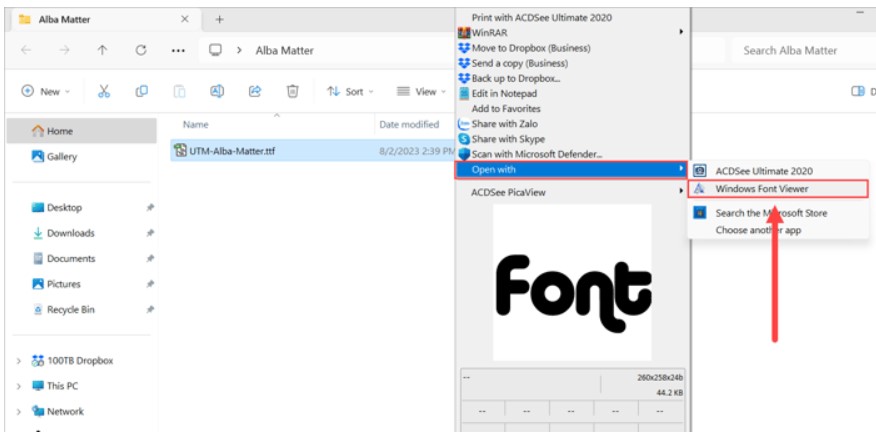
Step 1 : Open the folder containing the font, right-click on the font and select Open With → Windows Font Viewer to view the font using the default software on Windows.
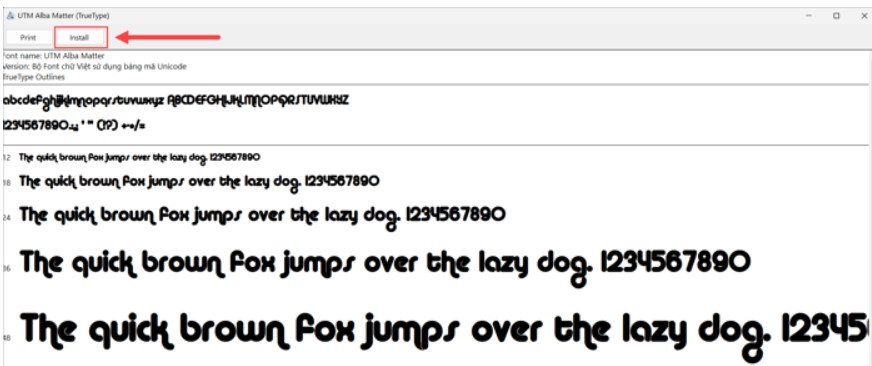
Step 2 : When the font preview window appears, select Install to install the font on your computer.
If you have more fonts, you can do the same to quickly add fonts to Word.
2. Method to add multiple fonts to Word at once
When you download fonts from the Internet, you may encounter a situation where the fonts are bundled together in a set. If you install each font manually in large quantities, this will take a lot of time. Instead, you can use the method of adding fonts in bulk to save time.
Step 1 : Open This PC and access in the following order.
C:\Windows\Fonts (Or paste the path into File Explorer’s URL bar)
So, you have successfully opened the folder containing Fonts on your Windows computer.
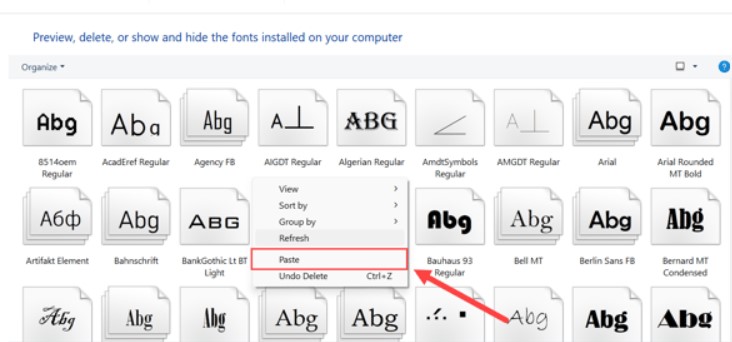
Step 2 : Next, copy all the fonts you want to install and paste them directly into the Fonts folder. When you paste the fonts here, it means that you have successfully installed the fonts.
3. Method to add Fonts to Word via Control Panel
Adding fonts using Control Panel is similar to adding fonts in bulk. This method mainly helps you better understand and know how to manage a large number of fonts on your computer.
Step 1 : Open Control Panel.
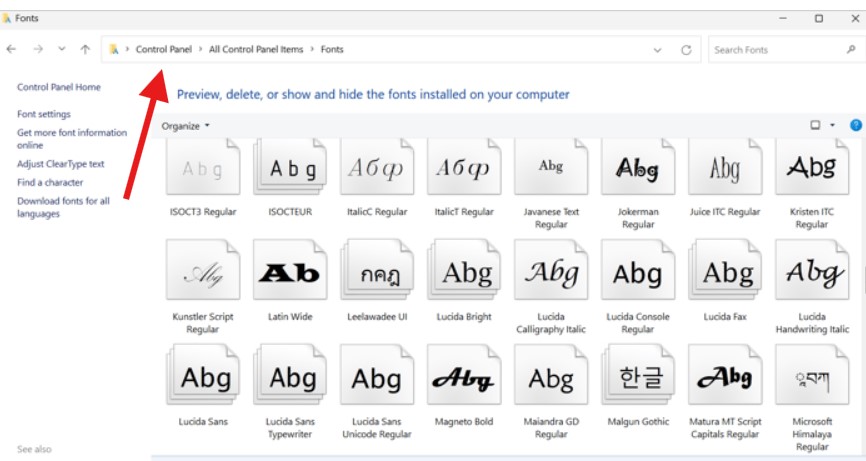
Step 2 : In Control Panel, go to the Fonts tab . Then, Copy and Paste all the fonts you want to install into the Fonts folder in Control Panel.
II. Method to delete Fonts in Word
When you install multiple fonts at the same time, it may lead to you not being able to control the input quality, installing unnecessary fonts on your computer. In this case, you just need to delete the fonts and it’s done.
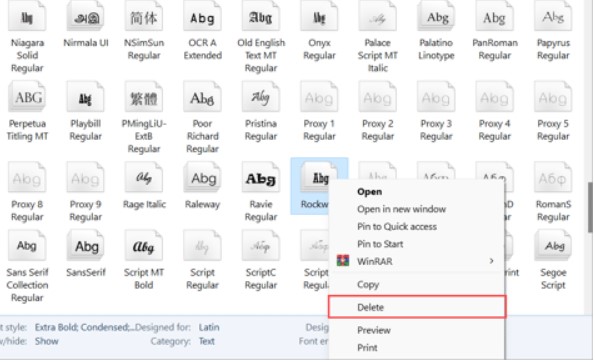
Step 1 : Open Control Panel..
Step 2 : In Control Panel, go to the Fonts tab .
Step 3 : Next, right-click on the fonts you want to delete and select Delete to remove them from the system.
In this article, We have guided you how to add fonts to Word easily and quickly. Hope the article is useful to you. Wish you success.
See more: How to Remove Text Between Brackets in Microsoft Word Easily
