When making quick reports, you need to do it every day and have to correct the date according to the submission date. The skill of Automatically updating the date in Microsoft Word will help you save time when making reports and improve work efficiency. Let’s find out right after this.
Nội dung
Steps to Automatically Update Date in Microsoft Word
For example, we have the following work report template:

Step 1: In the Insert tab, select Date & Time
Click to open the Insert tab on the Toolbar and then click Date & Time (calendar icon) to open the date and month options table in Word.

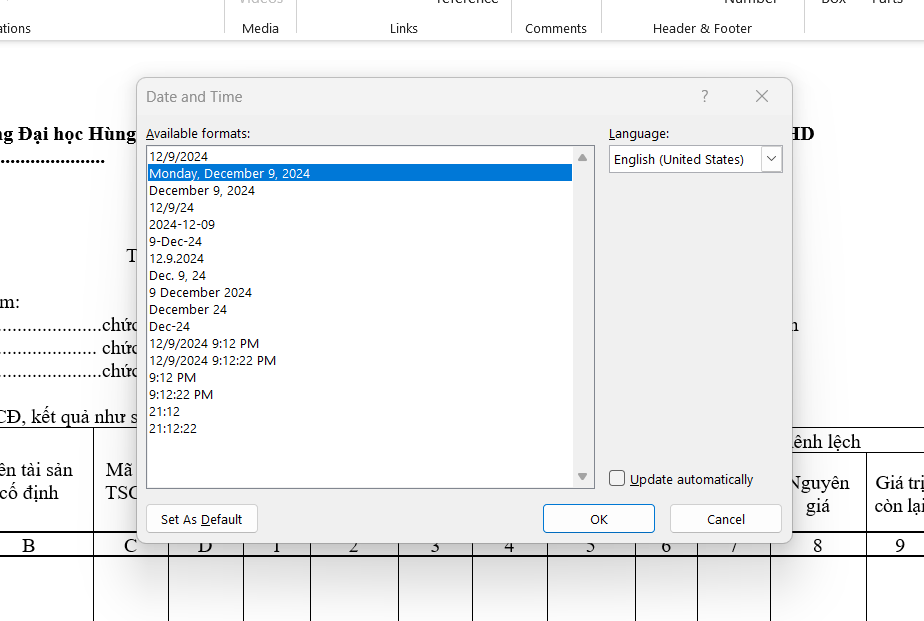
Step 2: Select custom date format
Then, under Language, click the drop-down arrow on the right and select the language you want the date to be displayed in.
Then select the date format you want to display. Here we have chosen the basic format of day/month/year (September 12, 2024)
Step 3: Check the box to automatically update the date in Word
Check the box Update automatically to automatically update the date and click OK.

Results Automatically update date in Word
With just 3 simple steps, you’re done and can enjoy the results below.

Automatic date update in Word is a useful and necessary feature in human resource administration, especially when you need to make daily reports. Hope this article is useful to you.
See more: Instructions on how to use Microsoft Word to edit PDF files very simply
