Home Powerpoint How to cite images in PowerPoint in 3 simple steps

How to cite images in PowerPoint in 3 simple steps

by Kim Thu
A+A-
Reset

Inserting image citations in a slide is completely different from inserting citations in Word, when you already have the option to insert citations into the document. With PowerPoint, you need to use another tool when there is no option to insert citations. The following article will guide you how to cite images in PowerPoint.

I. Citation guidelines for images in PowerPoint

Step 1: We insert the image into PowerPoint as usual. Next, click on Text box and draw a text box right below the image.
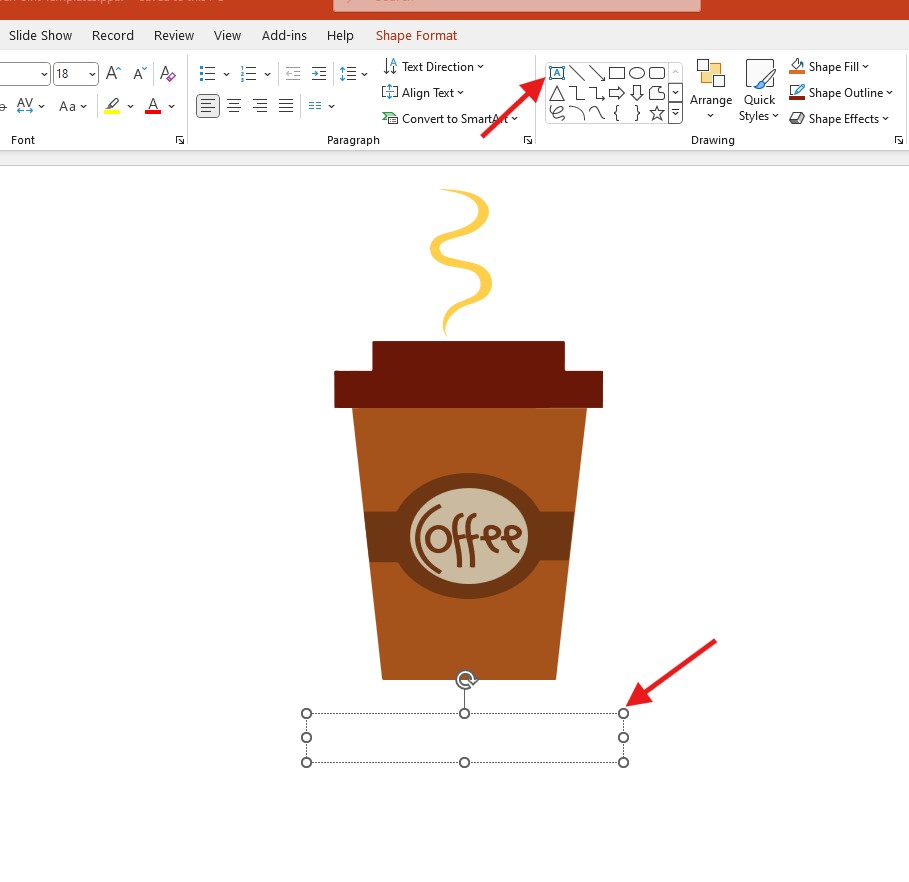
How to cite images in PowerPoint

Step 2: Enter the quote content into the text box you created. Then we adjust the format , font, font size, and font color as usual.

Step 3: So you have finished inserting the quote for the image. In addition, you should also group the image and the quote into one group to make it easier to move or perform operations, copy, cut or resize the image. Then the operations are performed simultaneously.

We press the Ctrl key and then click directly on the image and the created quote. Then right-click and select Group and then select Group to group the two objects together.
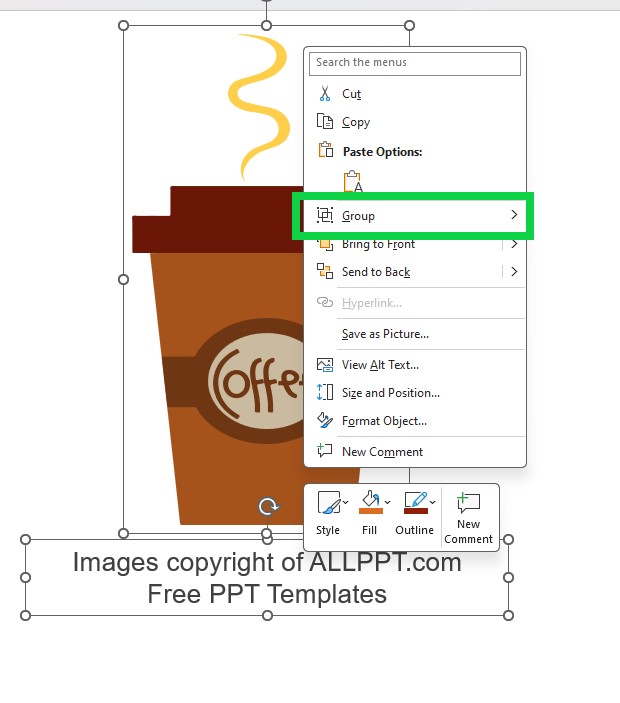
If you don’t want to group the two objects anymore, right-click and select  Ungroup .

II. Citation Formatting in PowerPoint According to International Standards

Here’s how to format citations in PowerPoint slides using three main styles: MLA, APA, and Chicago (Details at writeanswers.royalroads.ca

1. MLA Style

Step 1: Label the Image with a Number
Label the image using the word “Fig” (short for “Figure”) followed by a number. For the first image in the presentation, the citation begins with “Fig. 1.”
Use bold formatting for both the abbreviation and the number, followed by a period.
Example:
Fig. 1.

Step 2: Include a Title or Description of the Image
If the image has a title, enclose it in quotation marks. If not, provide a brief description of the image.
Follow the title or description with “from:” to lead into the source.
Example:
Fig. 1. A mural of a colorful bird from:

Step 3: Provide the Source with Full Citation
Include the full citation of the source directly in the image caption. While MLA does not mandate including this in the Works Cited section, doing so adds clarity.
If the image is online, you can include the direct URL instead of page numbers.
Example:
“Bird Mural Art,” 15 Feb. 2021, pxhere.com/en/photo/12345. Accessed 20 Dec. 2024.

Step 4: End with Copyright or Creative Commons License Information
Add copyright or license details to the caption.
If you cannot find copyright or license details, do not use the image in your presentation.
If available, include the information and end with a period.
Example:
Creative Commons CC BY-SA 3.0.

Complete MLA Caption Example
Fig. 1. A mural of a colorful bird from: “Bird Mural Art,” 15 Feb. 2021, pxhere.com/en/photo/12345. Accessed 20 Dec. 2024. Creative Commons CC BY-SA 3.0.

2. APA Style

Step 1: Label the Image with a Number
Write “Figure” followed by a number in italics beneath the image. End with a period.
Example:
Figure 1.

Step 2: Describe the Image in the Caption
Provide a brief description of the image with the first letter capitalized. APA does not require the original title of the image, only a short description.
End the description with a period.
Example:
Figure 1. A group of students studying in a modern library.

Step 3: Provide Source Information
Write “Adapted from,” followed by the title, author, year of publication, and URL.
If the image is a reproduction, ensure you indicate the source.
Example:
Adapted from “Modern Library Spaces,” by John Doe, 2021, retrieved from https://www.unsplash.com/photos/xyz123.

Step 4: End with Copyright or Creative Commons License Information
Include information verifying the image’s usage rights. Use the abbreviated license name if applicable.
Example:
CC BY-NC-SA 4.0.

Complete APA Caption Example
Figure 1. A group of students studying in a modern library. Adapted from “Modern Library Spaces,” by John Doe, 2021, retrieved from https://www.unsplash.com/photos/xyz123. CC BY-NC-SA 4.0.

3. Chicago Style

Step 1: Label the Image with a Number
Label the image using the word “Figure,” followed by a number and a period.
Example:
Figure 1.

Step 2: Add an Image Caption
Include the title of the image (if available) or a brief description. Write a sentence connecting the image to the presentation content.
Example:
Figure 1. The Banquet of Cleopatra by Giambattista Tiepolo depicts a contest between Cleopatra and Mark Antony.

Step 3: Provide Full Citation as a Footnote or Bibliographic Entry
List the artist’s name, title, year of creation, dimensions, materials (if applicable), and the source.
If the slide is too long, you can include this information in a separate footnote or in the Bibliography section.
Example:
Giambattista Tiepolo, The Banquet of Cleopatra, 1743-44, oil on canvas, 250.3 x 357.0 cm, accessed 24 May 2018, http://www.ngv.vic.gov.au/col/work/4409.

Complete Chicago Caption Example
Figure 1. The Banquet of Cleopatra by Giambattista Tiepolo depicts a contest between Cleopatra and Mark Antony. Giambattista Tiepolo, The Banquet of Cleopatra, 1743-44, oil on canvas, 250.3 x 357.0 cm, accessed 24 May 2018, http://www.ngv.vic.gov.au/col/work/4409.

III. Tips for Creating Citations in PowerPoint

  • Choose the right citation style: Use MLA, APA, or Chicago and ensure consistency throughout the presentation.
  • Make citations clear and legible: Place them at the bottom of the slide or in a corner with a smaller font size than the main content.
  • Use concise in-slide citations: Keep in-slide citations brief and provide full details in a final reference slide.
  • Cite images and charts: Add sources below images or charts, e.g., “Source: World Bank, 2023.”
  • Ensure accuracy: Verify the completeness and correctness of all sources.
  • Provide a reference list at the end: Create a dedicated slide titled “References” or “Works Cited.”
  • Use citation tools: Utilize PowerPoint or software like Zotero or Mendeley for automatic citation formatting.
  • Respect copyright laws: Only use legal materials and images, and clearly acknowledge all sources.

Citing images in PowerPoint not only makes your presentation more professional but also ensures that intellectual property and copyright are respected. By using the correct citation styles such as MLA, APA, or Chicago, you can present your sources clearly and accurately. Always choose the citation style that is appropriate to your purpose and audience to make the best impression.

See more: How to Insert Footnotes in PowerPoint in 4 Easy Steps

Bài viết cùng chuyên mục

Leave a Comment

Về chúng tôi

Chào mừng các bạn đến với “Hoa ngữ Phổ truyền ” – nơi chúng tôi luôn cố gắng giúp bạn học tiếng Trung một cách tốt nhất! Chúng tôi hân hạnh được chia sẻ với cộng đồng những kiến thức, tài liệu, phần mềm trải nghiệm học tiếng Trung và văn hóa truyền thống Trung Hoa.

Bài viết nổi bật

@2023 – Bảo lưu mọi quyền. Được thiết kế và phát triển bởi hoanguphotruyen