Create a photo album without professional design software, do you believe it? We can really do it, just knowing how to use Powerpoint tools, you can completely create extremely unique and different photo albums. Let’s follow the details of how to create a photo album in Powerpoint in the article below.
How to create a photo album in Powerpoint
Step 1 : First, go to the Insert tab on the toolbar → Photo Album → New Album
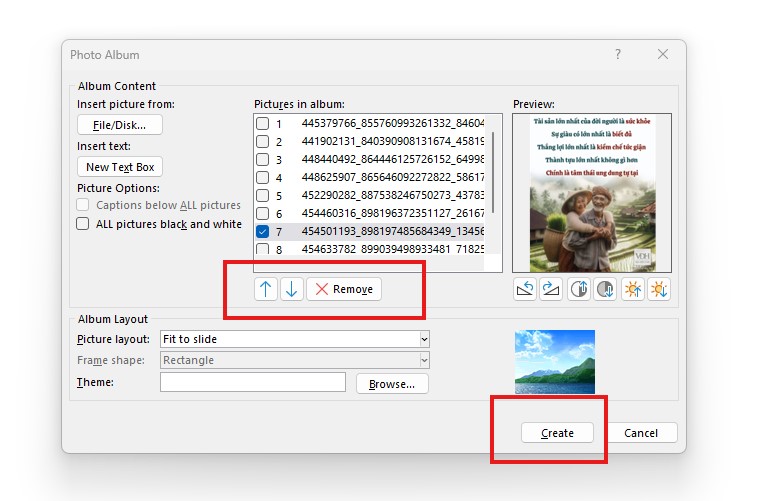
Bước 2: Now the Photo Album dialog box appears, left-click on File/Disk to select the images you want to put in the album.
.jpg)
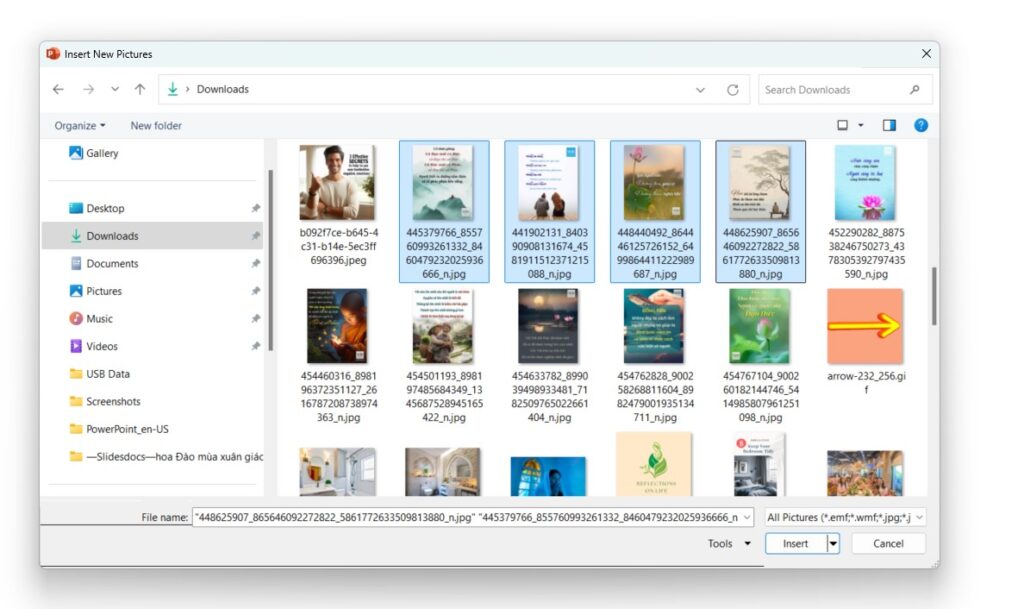
Step 3 : The Insert New Picture window appears, select the image you want to add to PowerPoint and click Insert

Step 4 : After adding pictures, you can edit and change the position of each picture. To change the position of the picture, left-click on the square box in front of the picture you want to edit in the Pictures in album section, then press the up and down arrows.

You can also delete the image by clicking Remove next to the up and down arrows.
You can rotate the image as you like by clicking on the 2 triangle icon on the right.
Similarly, you can increase or decrease the brightness of the image by clicking on the light icon with up and down arrows.
Step 5 : After customizing the image as desired, click to select all the photos in the Pictires in album section, then click the down arrow in the Picture layout section → Fit to slide . The purpose of this step is to make the image size fit the slide. Of course you can choose other options to suit your purposes.
.jpg)
Step 6 : After customizing the settings, click Create to create the album.
So we have a photo album made from Powerpoint. Let’s see the result.
The first slide is where you write information like the album designer, etc. The remaining slides will contain photos, each slide will contain 1 photo.
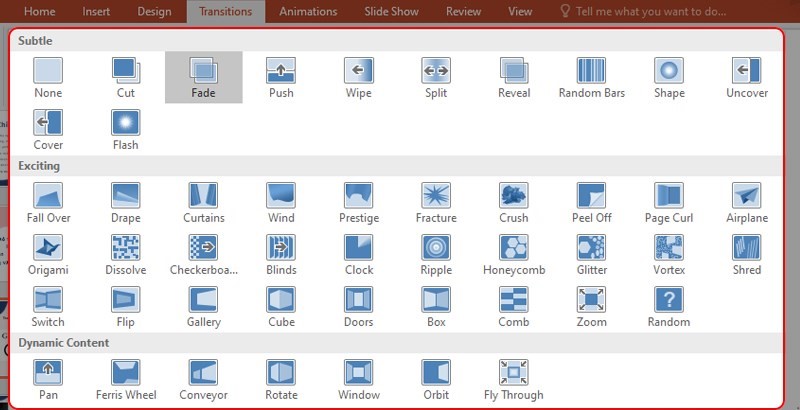
Step 7 : To complete the album, let’s create an effect for the photo. Click on the photo you want to insert, go to the Transition tab and choose the effect you want.

If you want to create an animation effect, left click on the image → Animation , then choose the appropriate effect.
So we have learned together how to create a photo album using PowerPoint. You see, the method is straightforward, right?
Follow our Blog so you don’t miss out on any good knowledge and tips about Powerpoint. Thank you for reading and wish you success.
See more: The Best Free Resources for PowerPoint Slide Design
