A PowerPoint presentation on a computer without effects will easily bore the audience. So, in this article, I want to share with you the steps to create slide transition effects and objects in PowerPoint to help show professionalism and clarify the content that I want to express.
Nội dung
1. Create effects for text
Quick Guide
- Select the text that needs an effect > Select the Animations tab > Select the effect in the Animation frame.
- To edit the effect, you do it in the Timing section.
- To check and edit click Animation Pane.
- To remove the effect, highlight the text and select None in the Animation section.
Detailed instructions
Step 1: Highlight the text or select the text box that you need to create an effect > Click the Animations tab.
Step 2: In the Animation frame, select the effect for the text.
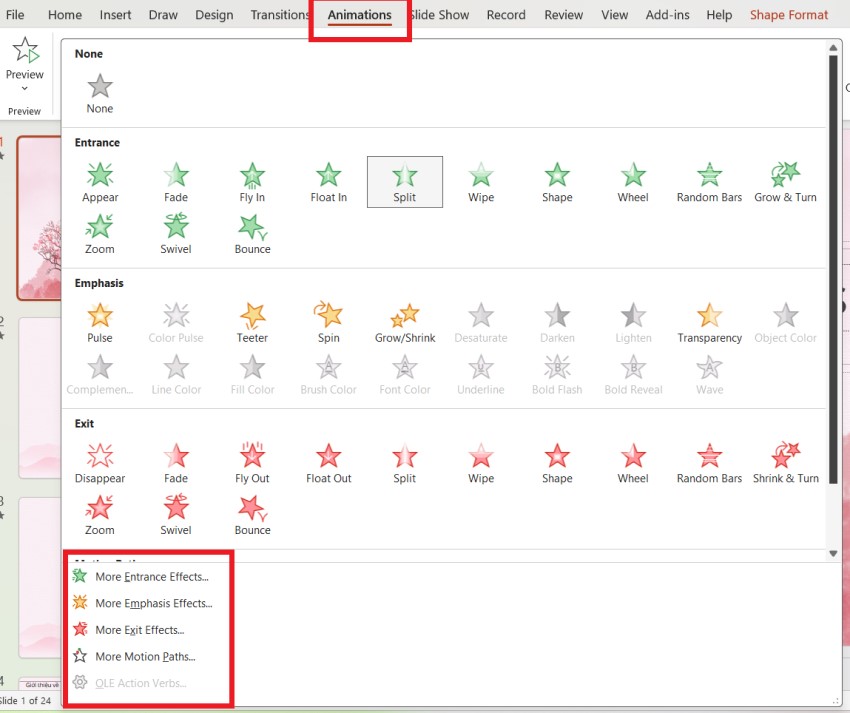
To display more effects, click More below the effects box.
- Entrance: appearance effect – the object will appear according to the motion and settings you set.
- Emphasis: emphasis effect – the object will appear to focus the listener’s attention, helping you highlight that content.
- Exit: disappear effect – the object will be hidden according to the motion and settings you set.
- Motion Paths: motion effects along drawn paths – objects will appear and disappear along the path you previously drew.

Step 3: To edit the effect , do it in the Timing section of the selected Animations tab.
- Start: set the time the effect occurs including when you click the mouse (On Click), or at the same time as the previous effect (With Previous) or after the previous effect is completed (After Previous).
- Duration: set the duration of the effect.
- Delay: set the delay time for the effect to occur.

Step 4: To check and edit the effects used, click Animation Pane to display the effects frame on the right side of the screen. Here you will see each effect used for the objects in the slide.
Note: You can also click Preview to preview the effect used.
Step 5: To remove the effect, highlight the text and select None in the Animation section.
2. Create effects for the graph
Quick Guide
- Select the graph to create an effect > Select the Animations tab > Select the effect in the Animation frame .
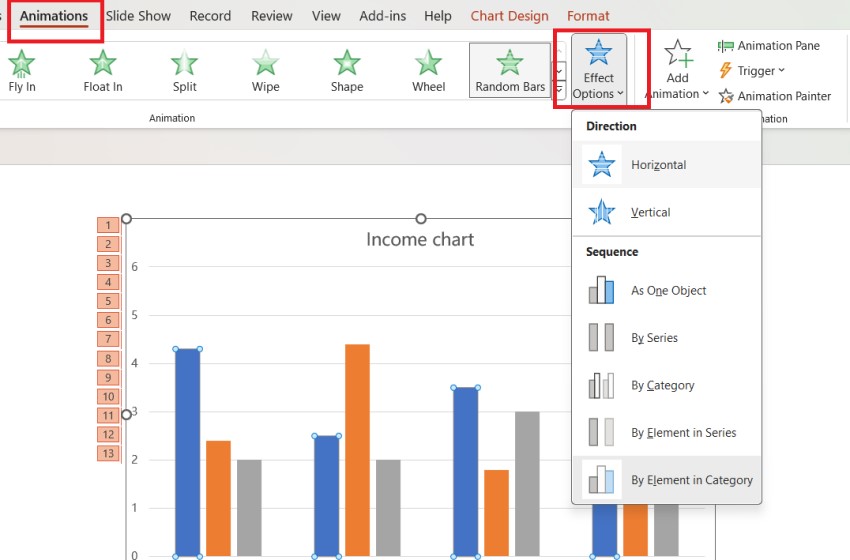
- To create effects for objects in the graph , click Effect Option .
- To edit the effect , you do it in the Timing section .
- To remove the effect , highlight the text and select None in the Animation section .
Detailed instructions
Step 1: Click to select the graph you need to create an effect on > Select the Animations tab .
Step 2: In the Animation frame , you choose the effect for the graph .
To display more effects, click More below the effects box.
- Entrance: appearance effect – the object will appear according to the motion and settings you set.
- Emphasis: emphasis effect – the object will appear to focus the listener’s attention, helping you highlight that content.
- Exit: disappear effect – the object will be hidden according to the motion and settings you set.
- Motion Paths: motion effects along drawn paths – objects will appear and disappear along the path you previously drew.
Step 3: To create effects for objects in the graph, click Effect Option.

Step 4: To edit the effect , do it in the Timing section of the selected Animations tab.
- Start: set the time the effect occurs including when you click the mouse (On Click), or at the same time as the previous effect (With Previous) or after the previous effect is completed (After Previous).
- Duration: set the duration of the effect.
- Delay: set the delay time for the effect to occur.
Step 5: To remove the effect , select the graph again and click None in the Animation section.
3. Create effects for images
Step 1: Click to select the image you need to create an effect on > Click the Animation tab .
Step 2: In the Animation section, you choose the effect for the image.
To display more effects, click More below the effects box.
- Entrance: appearance effect – the object will appear according to the motion and settings you set.
- Emphasis: emphasis effect – the object will appear to focus the listener’s attention, helping you highlight that content.
- Exit: disappear effect – the object will be hidden according to the motion and settings you set.
- Motion Paths: motion effects along drawn paths – objects will appear and disappear along the path you previously drew.
Step 3: Select the type of Motion Paths effect you want to create. At this time, the effect path appears on the interface, you can edit the effect path length, short.. by placing the mouse cursor on the small white squares, then hold down and drag the mouse to the desired position.

Step 4: To edit the effect, do it in the Timing section of the selected Animations tab.
- Start: set the time the effect occurs including when you click the mouse (On Click), or at the same time as the previous effect (With Previous) or after the previous effect is completed (After Previous).
- Duration: set the duration of the effect.
- Delay: set the delay time for the effect to occur.
Step 5: To remove the effect, select the image again and click None in the Animation section.
4. Create slide transition effects
Quick Guide
- Select the slide to create an effect > Select the Transitions tab > Select the page transition effect in the Transition to This Slide section.
- To edit the effect, you do it in the Timing section.
- To preview the effect, click Preview.
- To remove the effect, click None in the Transition to This Slide section.
Detailed instructions
Step 1: Select the slide that you need to create a transition effect for > Click the Transitions tab .
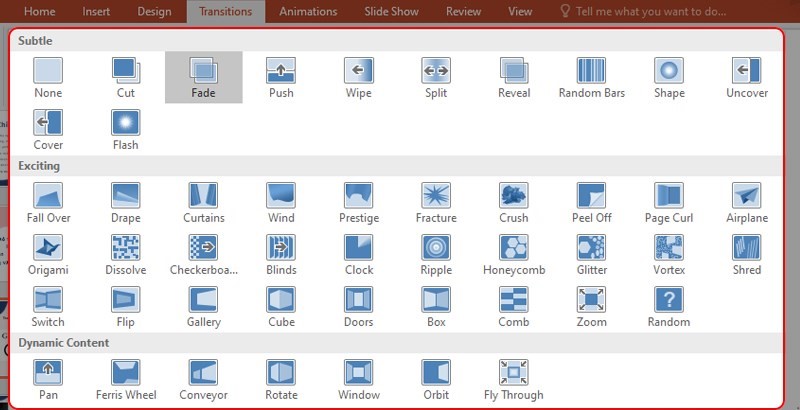
Step 2: In the Transition to This Slide section, choose the slide transition effect you like .
Note: You can tap the dash and arrow icon for more slide transition effect options.

Step 3: To edit the effect, you do it in the Timing section of the selected slide transition card.
Step 4: Click Preview to preview the effect used for the slide.
Step 5: To remove the effect , click None in the Transition to This Slide section.
Above are my shares on the steps to create page transition effects, image effects in PowerPoint . Hope you will also be successful and if you have any questions during the process, please leave a comment below so I can support you!
See more: Instructions on how to number pages in PowerPoint on Windows and MacOS
