Using a countdown timer in presentations helps create professionalism and fairness in competitions. So, if you don’t know how to create a countdown timer in PowerPoint, follow the instructions below!
Nội dung
1. Use Add-ins to Create a Countdown Timer
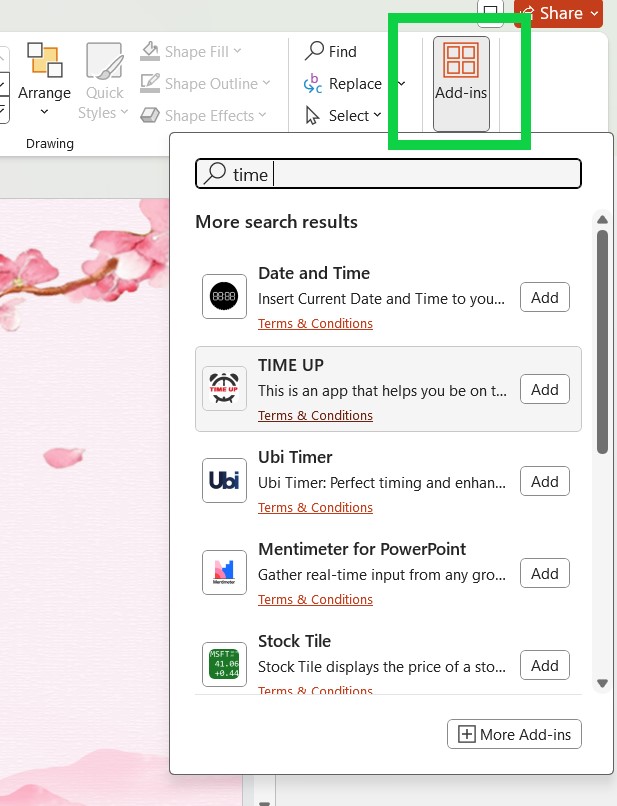
Step 1: Go to the Home tab > Add-ins.
Step 2: Search for Add-ins such as Slice Timer, Breaktime Countdown, or PP Timer.
Step 3: Install the Add-in and insert the countdown timer into your slide.
2. Create your own countdown timer
How to Create a Countdown Clock in PowerPoint
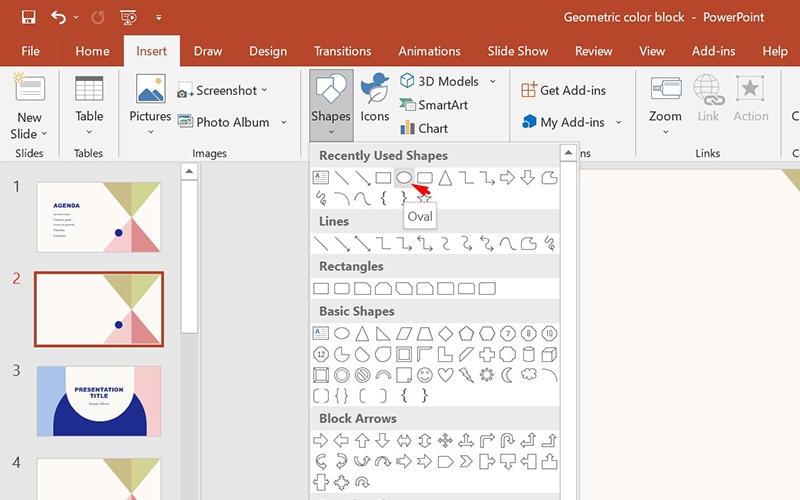
Step 1 : Open PowerPoint file > Go to Insert tab on toolbar > select Shapes .
- Since PowerPoint does not have a circle available, select the Oval icon , then hold down the Shift key and drag the mouse on the slide to create a circle.
- You can also choose any shape you want, it doesn’t have to be circular.
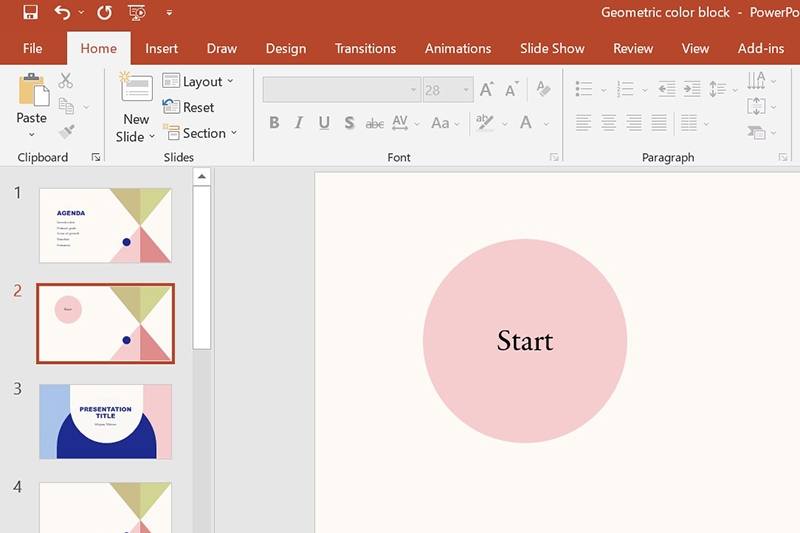
Step 2 : After creating a shape with the appropriate size, right-click on that shape and select Edit Text .
Step 3 : Type Start inside the circle. This is the starting point to run the clock. You can customize the font, font size and color,… if you want.
Make a countdown timer in PowerPoint
After creating the Start button, you will continue to create other buttons to complete the countdown timer. Specifically as follows:
Step 1 : Duplicate the Start button you just created by clicking on it and using the key combination Ctrl + D then moving it to the side. Or you can use the Copy – Paste operation.
Replace the Start text of the second circle with a number , starting with 30 .
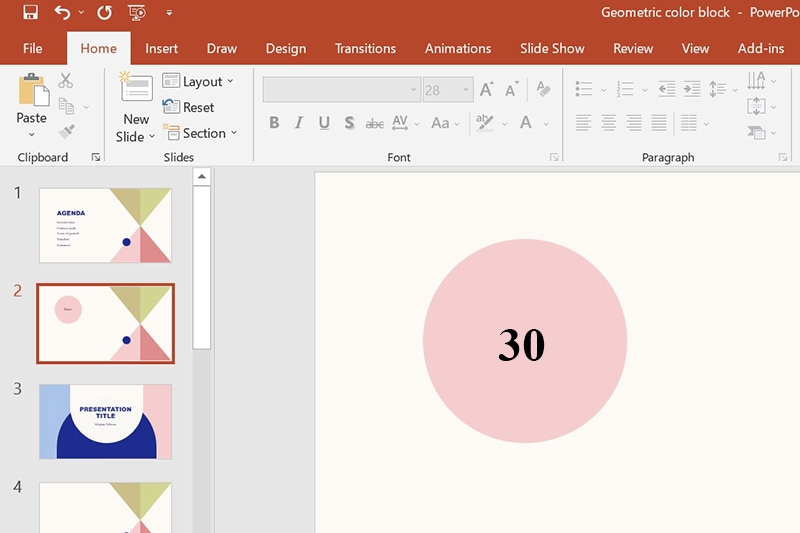
Step 2 : Select the newly created button 30, go to the Animation tab > In the Entrance group, choose any effect to create an appearance effect for the button.
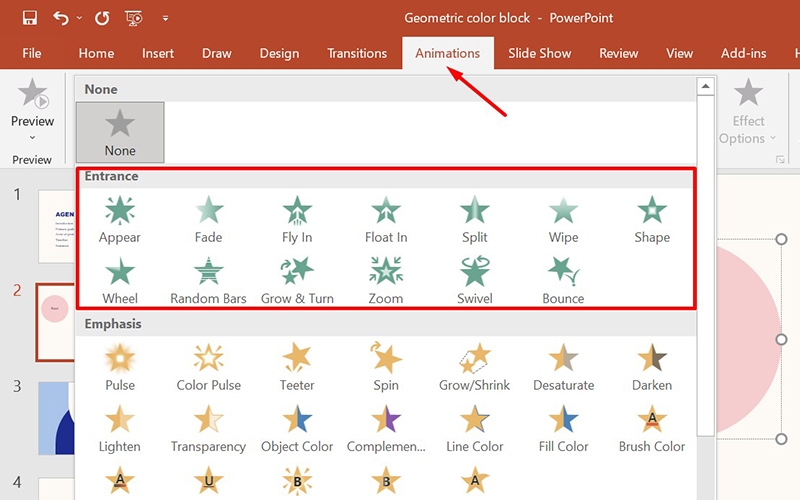
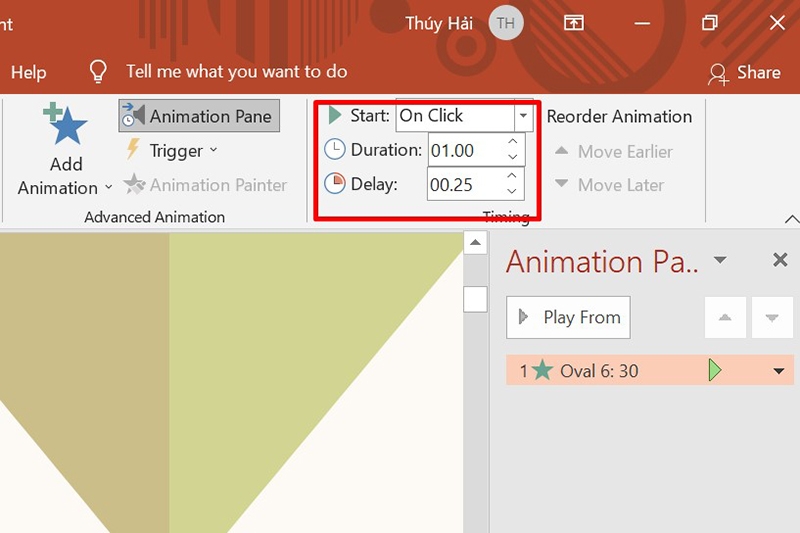
Step 3 : Select Timing and adjust the button’s appearance time. For example:
- Start : Select On Click then button 30 will appear as soon as you click on the screen.
- Duration : Setting the time to 01.00 means the 30th button of the clock will run for 1 second.
- Delay : Set the time to 00.25, then after you click the mouse 0.25s, the 30 button will start running according to the movement.
To preview the motion, select Preview just below the File tab.
Step 4 : Continue to duplicate button 30 to make buttons 29, 28, 27,… 1 and finally the End button.
For these back buttons, you will adjust the Start time to After Previous so that the buttons appear one after another when the previous button ends.
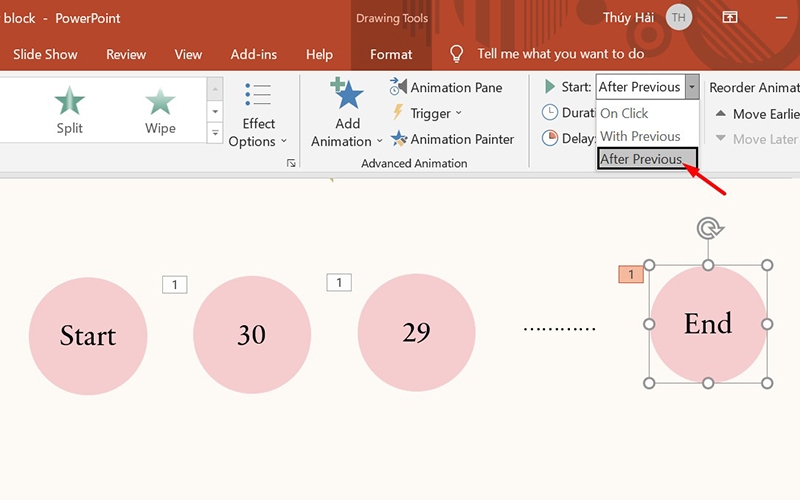
Step 5 : Stack the buttons on top of each other to create a clock shape and you have successfully created a countdown clock in PowerPoint.
Note : The number of buttons depends on the time interval you want to count. For example, if you want to count down for 60 seconds, you need to create buttons from 60 to the End button. If you want the count interval to be 2 seconds, then in the Duration section, set it to 02.00.
Add sound to countdown timer in PowerPoint
If you want to add sound to your countdown timer, follow these instructions:
Step 1 : Go to Insert tab > Select Audio > Select Audio on my PC .
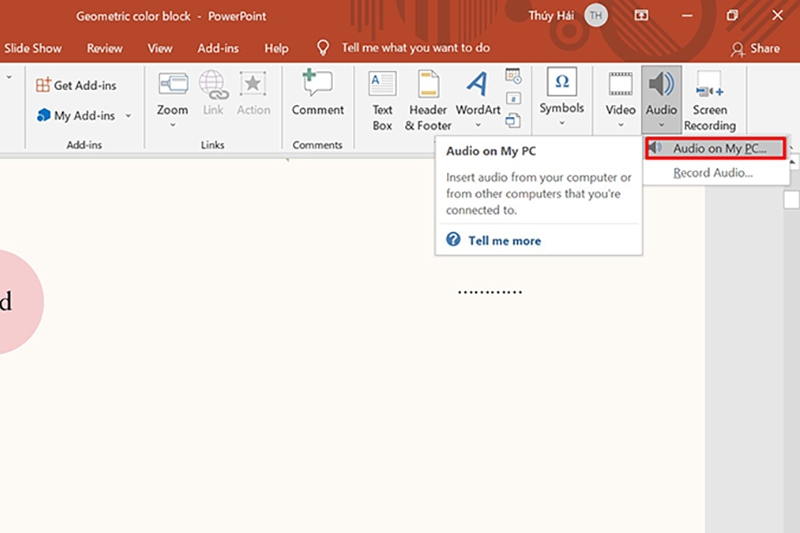
Step 2 : Select the audio file you want to insert > Click Insert .
Step 3 : Select Play in background in Audio Styles to set autoplay mode for audio files.
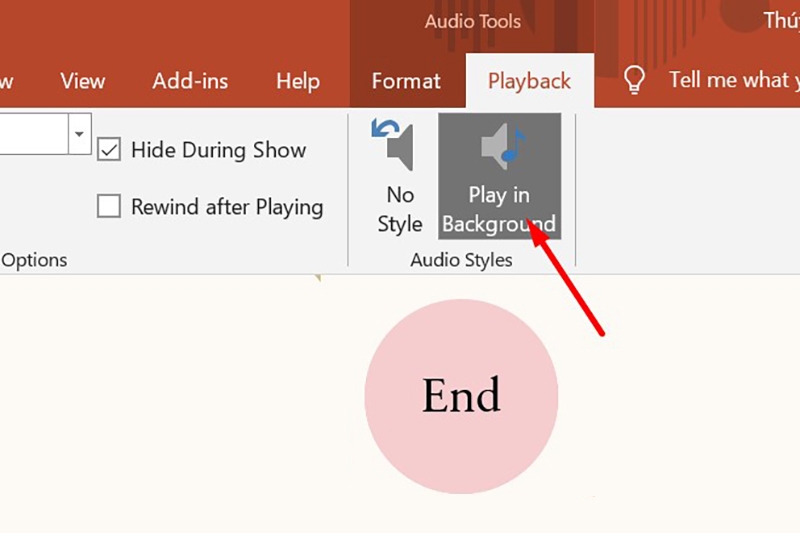
Step 4 : Drag the speaker icon to the clock and you’re done.
Insert or move a countdown timer in Powerpoint
Once you’ve created a countdown timer in PowerPoint, you can move the timer to any location.
To insert a clock into another slide, do the following:
Step 1 : Select the newly created clock > Go to Format tab > Select Arrange > Select Selection Pane .
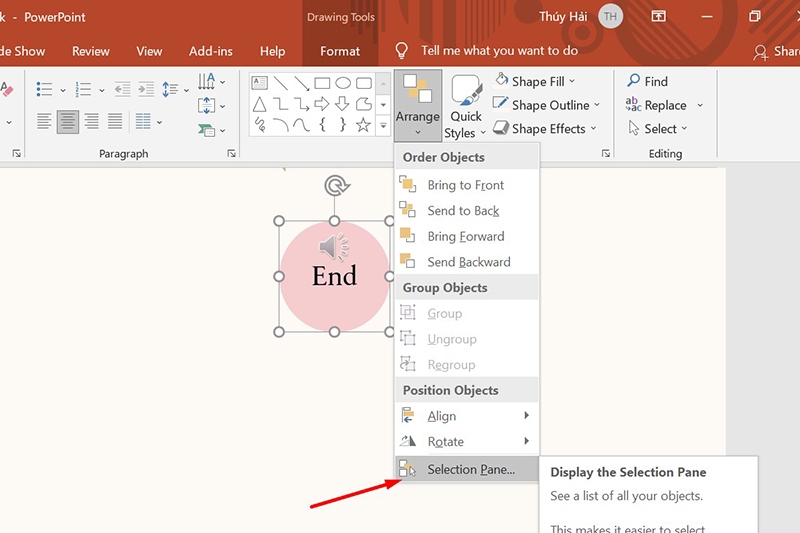
Step 2 : Highlight the area around the clock to select all buttons and sound files of the created clock.
Step 3 : Use Ctrl + C to Copy or Ctrl + X to Cut.
Step 4 : Select the slide or position where you want to insert the countdown clock > Press Ctrl + V to paste.
The article has guided you through the steps to create a countdown timer in PowerPoint. The operation is performed on PowerPoint 2019, other versions you do the same.
