Rotating and flip images, text, and objects is one of the basic features of Microsoft PowerPoint. In this article, we will share with you 4 ways to do that. Let’s take a look.
I. 5 ways to rotate and flip images, text, and objects in PowerPoint
1. How to rotate text corners and free objects using the mouse
Step 1 : Prepare any letter or object and click to select that letter or object .
Step 2 : Select the white arrow to rotate the angle above the selected object frame, hold the left mouse button and rotate the white arrow until you get the desired angle.
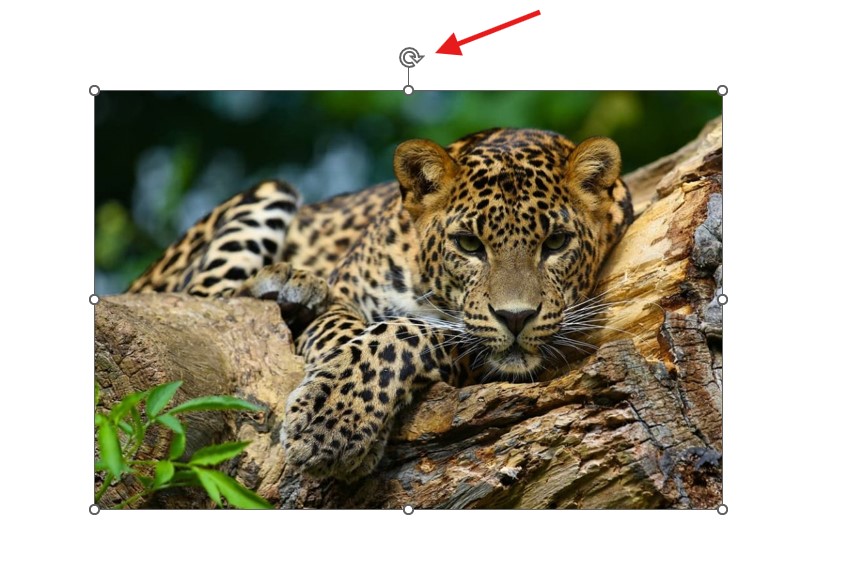
Hold the left mouse button and rotate the white arrow, swirling in the direction you want.
2. How to rotate 90 degrees and flip objects using Rotate
Step 1 : Prepare the text or object to be rotated 90 degrees. Click on the text or object to be rotated.
Step 2: After clicking on the text or object, the Format tab will appear on the Menu bar . Select the Format tab , then look to the far right and select Rotate to expand the rotation options.
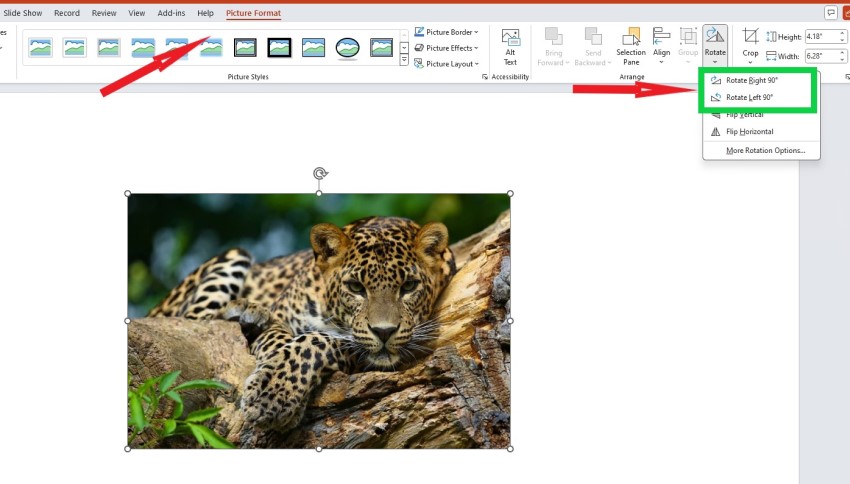
In the Format tab, select Rotate
Step 3: After the Rotate item drops down the list of available rotation angles, now depending on your wishes, you can choose one of the following two commands:
- Rotate Right 90 degrees : rotate right 90 degrees.
- Rotate Left 90 degrees : rotate left 90 degrees.
In the example below, we will choose to rotate right 90 degrees by clicking Rotate Right 90 degrees. The object to be rotated will automatically rotate 90 degrees from its original orientation.
3. Instructions for flipping text or objects using Rotate
Step 1 : Prepare the text or object to be rotated 90 degrees. Click on the text or object to be rotated.
Step 2: After clicking on the text or object, the Format tab will appear on the Menu bar . Select the Format tab , then look to the far right and select Rotate to expand the rotation options.
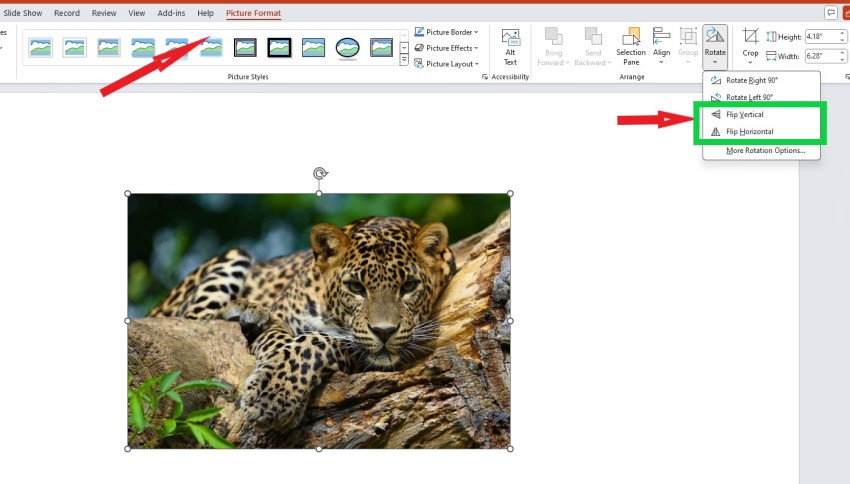
Step 3: In the Rotate section, if we want to flip text or objects, we can choose 1 of the 2 available options as follows:
- Flip Horizontal: flip horizontally 180 degrees.
- Flip Vertical: flip vertically 180 degrees.
In the following example, we will flip horizontally by clicking on Flip Horizontal. The flipped object will be facing the opposite direction of the original object.
4. How to rotate text and objects 15 degrees using shortcut keys
Step 1 : Prepare the text or object that needs to be rotated. Click on the text or object .
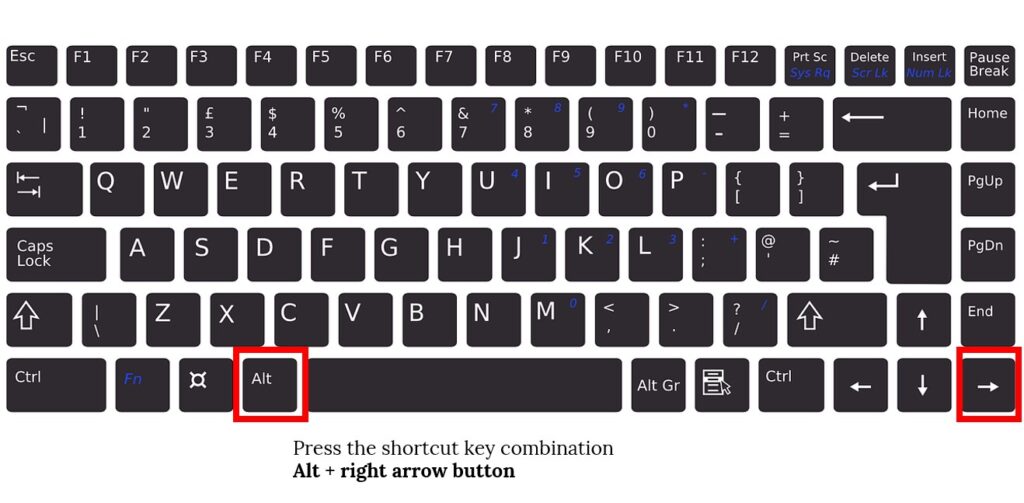
Step 2 : Press the shortcut key combination Alt + right arrow button to rotate 15 degrees clockwise or Alt + left arrow button if you want to rotate 15 degrees counterclockwise .
Results after rotating object 15 degrees using shortcut key.

5. How to rotate text and objects precisely by degrees
Step 1 : Prepare any letter or object to rotate, then click on the letter or object to rotate .
Step 2 : After clicking on the text or object, the Format tab will appear on the Menu bar . Select the Format tab , then look to the far right and select Rotate . Now we will select More Rotation Options .
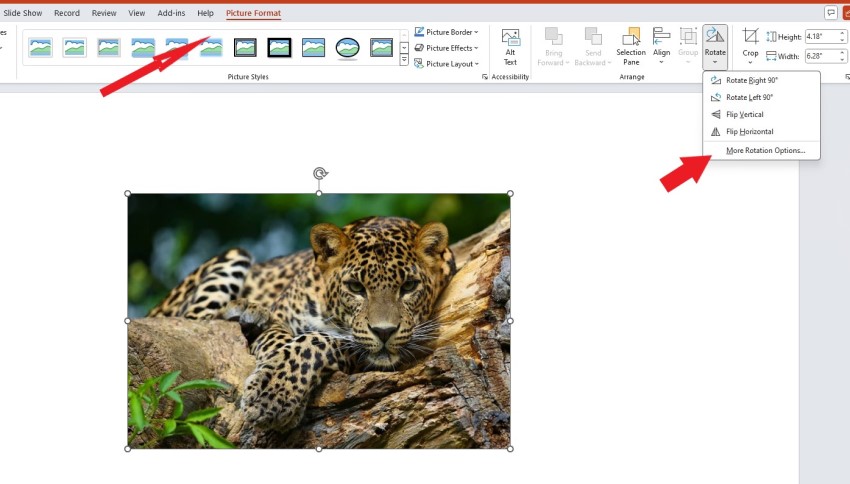
Step 3 : The Format Shape dialog box will appear, in the Shape Options section , select Rotation in the Size section to adjust the most accurate rotation angle. You can increase or decrease the rotation angle by entering directly into the white box of Rotation . The object will automatically rotate after we adjust the parameters.
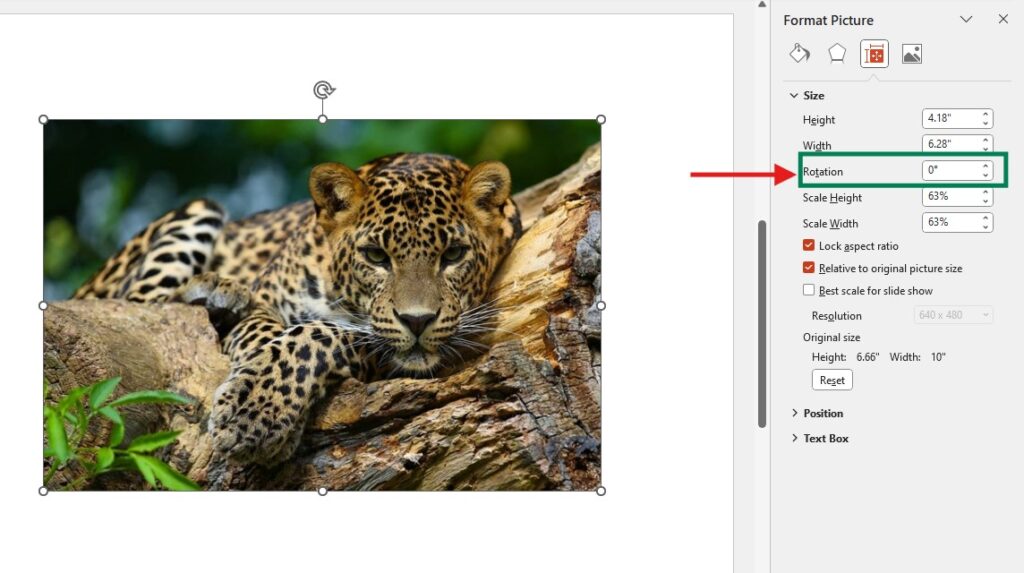
Adjust the rotation angle in the Rotate section in Format Shape. Results before and after rotating the object exactly in degrees.
Above are all 5 ways to rotate images, text, and objects in PowerPoint quickly and easily. Hopefully you have been able to rotate images, text, and objects successfully using the methods introduced above. Thank you for following this article, let’s follow other interesting topics here.
See more: How to insert notes into PowerPoint super simple and fast
