Document security or Setting a password for a Word file is a safety measure to prevent the risk of copying, editing and formatting important text files. So how to set a password for a Word file? This article will guide you specifically right after this.
Nội dung
1. Set password for Word file, lock file to protect the document
The most effective way to secure a document is to password-protect it. To do this, you perform a series of operations including:
Step 1: Select File > Save As
Open the document you want to protect, click File, then select Save As.
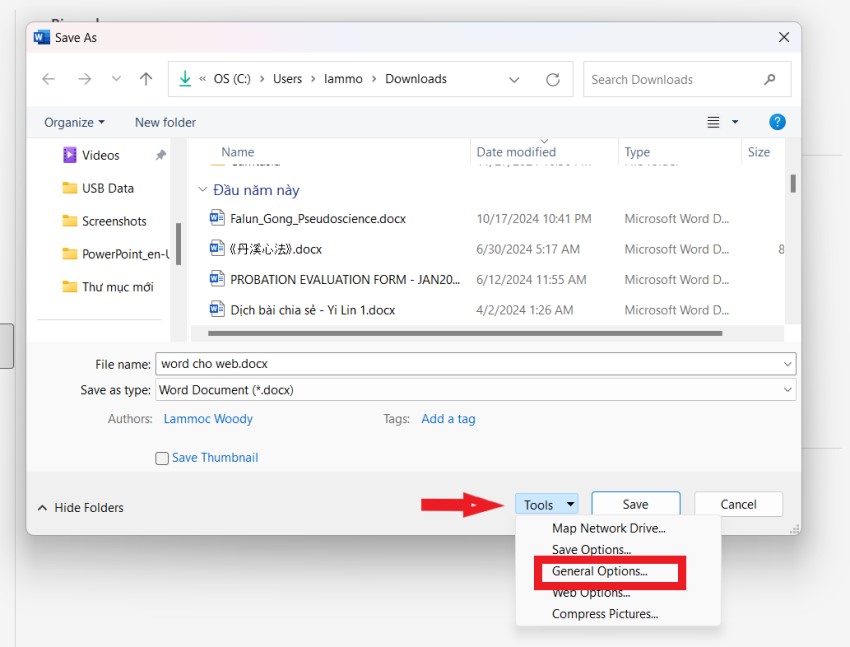
Step 2: Click Tools > General Options
The Save As dialog box appears, select the location to save the file and click Tools, select General Options… as shown.
Step 3: Set and confirm password for file
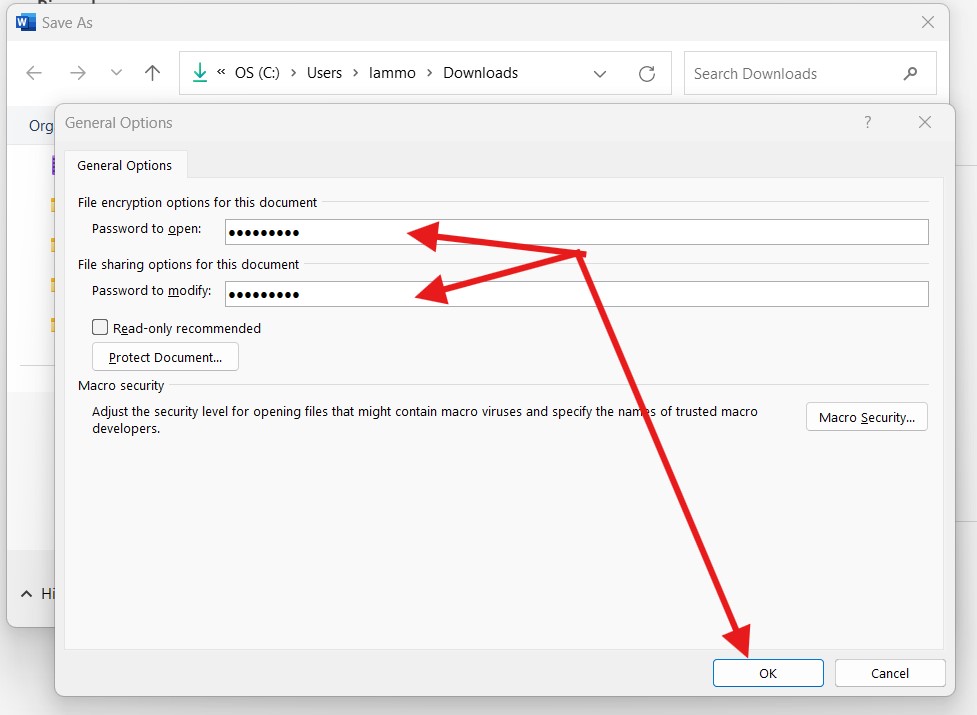
The system opens an interface to support setting a password for Word files.
There are 2 types of passwords:
+ Password to open: allows opening and viewing the document
+ Password to modify: allows editing of documents
Depending on your document security preferences, you set a password for the file. You can choose 1 or both, click OK
A password confirmation request appears, re-enter the password you just created and click OK.
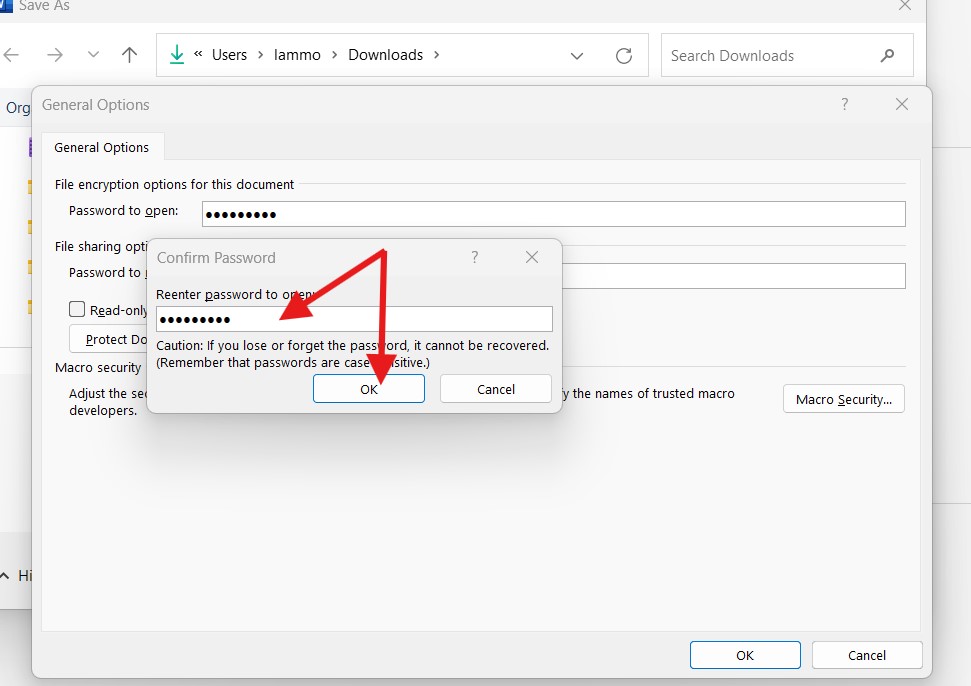
If you create 2 passwords, this request will appear twice. You confirm Password to open then Password to modify.
Step 4: Save the password protected document
Click Save As to save the security settings for the document.
Now, open the Word file above and you will receive a request to enter a password as shown.\
2. Enable Protect Document
In addition to the above method, you can also enable protection mode to secure documents as follows:
Step 1: Open the Restricts Editing panel
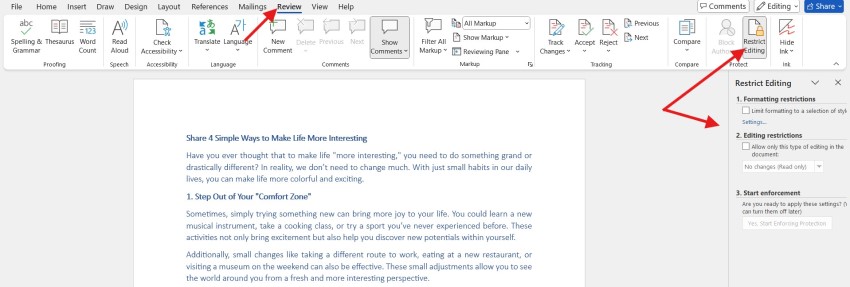
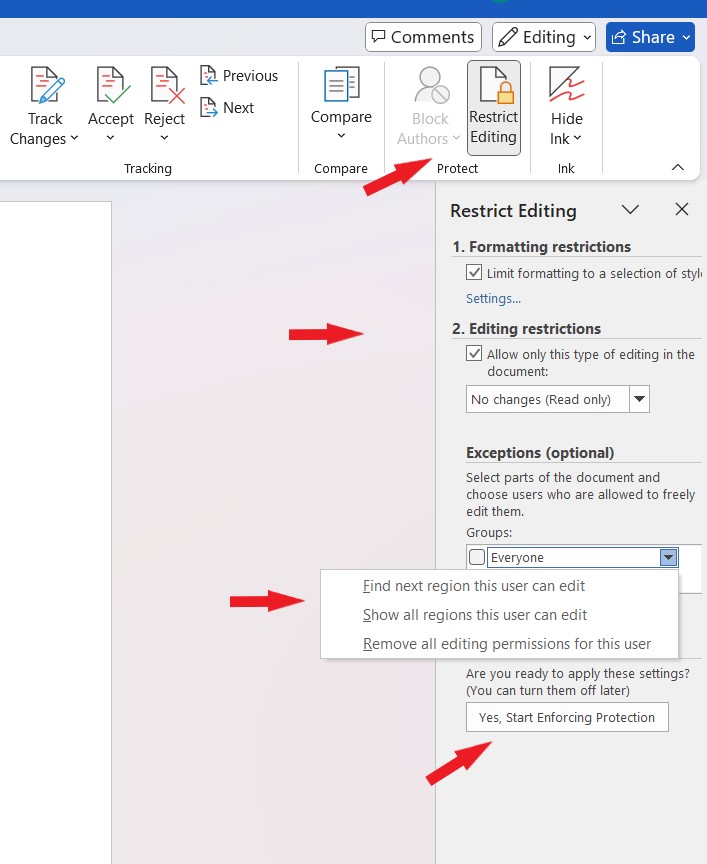
Open the document you want to protect, select Review, select Restrict Editing.
Step 2: Select to restrict editing and copying rights
Under Editing restrictions, check Allow only this type of editing in the document to restrict editing and copying of document content.
Step 3: Select permissions for the document
Select permissions for the document using the commands:
+ Tracked changes: allows document changes and leaves a record
+ Comments: allows adding comments to the text
+ Filling in forms: allows changing form objects
+ No changes (read only): read only
Step 4: Confirm settings and password
After selecting, click Yes, Start Enforcing Protection in the section below.
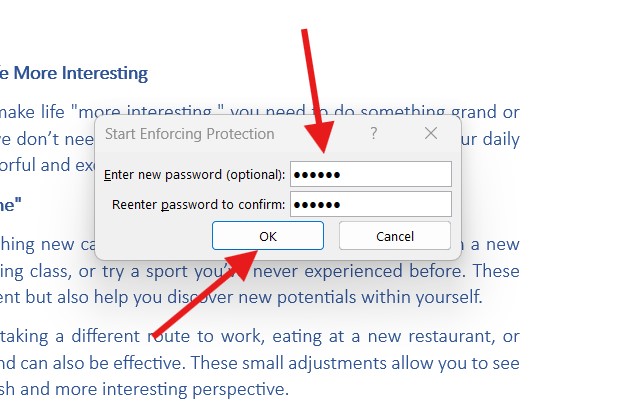
A new dialog box appears, enter your password and confirm it to set up security, click OK to finish.
3. Security by limiting editing operations on documents
To limit copying and editing on files
Step 1:
- Method 1: Go to the Review tab, in the Protect group, select Restrict Editing
- Method 2: Go to File/ Info tab, in Protect Document group, select Restrict Editing
Step 2: The Restrict Formatting and Editing window appears as shown below.
- Select Limit formatting to a selection of styles
- By default, content editing is locked.
- To allow certain editing operations, enable the Allow only this type of editing in the document option, then select the corresponding options : Track changes, Filling in Forms, Comments, No changes (read only)
Step 3: Click Yes , Start Enforcing Protection to perform the locking operation.
Step 4: In the Start Enforcing Protection dialog box , enter a password to lock the changes, select OK
To disable editing restrictions
Step 1: In the restricted document, select the Review tab .
Step 2: In the Review tab, go to the Protect group , select Restrict Editing to open the Restrict Formatting and Editing tStep 2: ask pane .
Step 3: In the task panel, click the Stop Protection button to disable protection.
Step 4: If the file is password-locked, the software will display a window asking you. Enter the password and click OK to confirm the unlocking.
Above are some ways to set a password for a Word file, and limit editing in part to prevent copying and editing. Hope this article is useful to you.
See more: How to divide text into multiple columns in Word and adjust column spacing easily
