Blurring images is essential in slide design to make your design more eye-catching and clear. This article will guide you through the simplest and fastest ways to blur images in PowerPoint.
Nội dung
I. How to completely blur an image in PowerPoint
Step 1: Open the slide containing the photo you want to blur, then click on that photo.
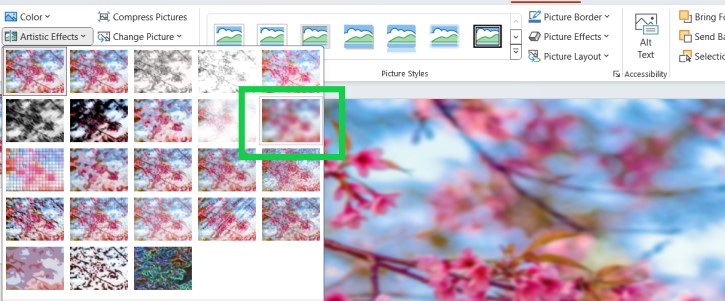
Step 2 : Now, the Picture Format tab will appear on the Ribbon bar . In the Adjust group , select Artistic Effects .

Step 3 : A list of photo blurs will appear in Artistic Effects , you choose the blur effect you want and click on that effect to complete.
II. How to blur image background in PowerPoint
Step 1 : Open the slide containing the image whose background you want to blur and click on that image. When the Picture Format tab appears on the Ribbon bar, select it and continue to select Remove Background for the system to remove the background.

Step 2 : Then, the Remove Background section will appear on the Ribbon bar . There are 2 tabs you need to pay attention to: Mark Areas to Keep and Remove used to change the blur range. Select Keep changes in the Remove Background section to save the previous options.

Step 3 : Insert the original image into the edited image. Then, click on the original image and select Artistic Effects in the Adjust group and then click Blur .

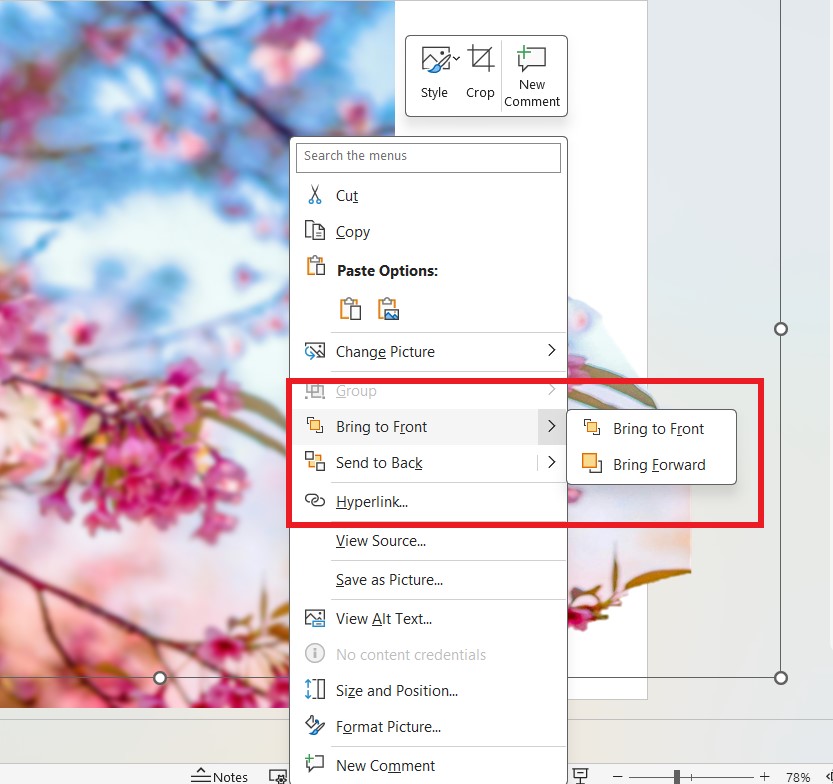
Step 4 : Right-click on the image with the background removed and click Bring to Front , then move the image with the background removed onto the blurred image to complete.

III. How to blur part of an image in PowerPoint
Step 1: Insert a Shape
- Open PowerPoint and navigate to the slide with the image you want to edit.
- Go to the Insert tab > Shapes.
- Choose a suitable shape (e.g., rectangle, circle) and draw it over the part of the image you want to blur.
- Adjust the size and position of the shape to match the area you want to blur.
Step 2: Create a Blur Effect for the Shape
Format the Shape:
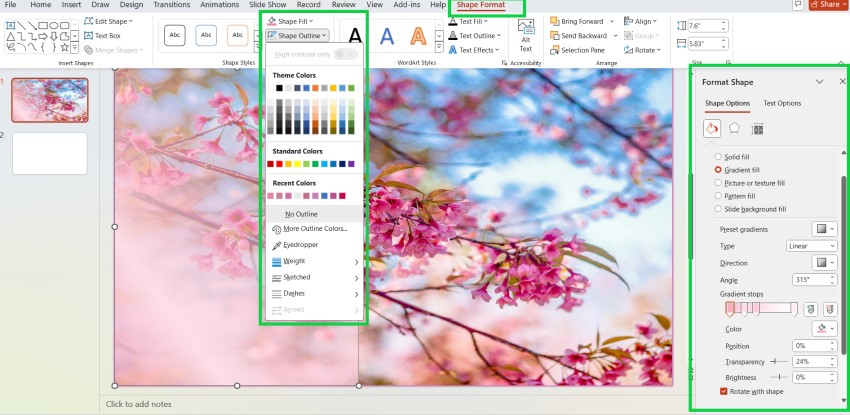
- Right-click on the shape and select Format Shape.
- In the Format Shape pane on the right, go to the Fill section.
Select Gradient Fill:
- Choose Gradient Fill.
- Add 2 or more Gradient Stops:
Stop 1: Set the color similar to the background or white and adjust the Transparency to around 50%-70%.
Stop 2: Choose a slightly darker or matching color and increase Transparency to create a fading blur effect.
Remove Shape Outline:
In the Line section, select No Line to remove the shape’s border.
Step 3: Position the Shape Over the Image
- Ensure the shape covers the area of the image you want to blur.
- If the shape is hidden behind the image, right-click the shape and select Bring to Front.
Step 4: Fine-Tune the Effect (Optional)
- Adjust the edge softness to create a seamless blur effect.
- Adjust the color, transparency, or apply Soft Edges for a more natural blur effect:
- Right-click the shape, select Format Shape > Effects > Soft Edges.

Note
- This method creates a simulated blur effect by overlaying a transparent shape over the image. PowerPoint does not support directly blurring part of an image like Photoshop.
- For a more precise blur effect, consider editing the image in a tool like Photoshop or another graphic design software and then reinsert it into PowerPoint.
IV. How to adjust the level of image blur in PowerPoint
Step 1: Open the slide with the photo whose blur level you want to change, then right-click on the photo so that the Picture Format item appears on the Ribbon bar.
Step 2: In the Adjust section of the Picture Format tab, select Transparency.

Step 3 : In the Transparency section , select the level of opacity you want and double-click to complete.
The above article has guided you how to blur images in PowerPoint in the most complete and simple way. Hopefully, through the above methods, you can perform this operation quickly. Wish you success.
See more: How to create effects in PowerPoint for any object
